How to Capture the Northern Lights in Iceland
Increase your chances of seeing the ethereal beauty of the Northern Lights in Iceland by keeping these tips in mind.

Whenever people find out that I recently went on vacation in Iceland, 99.9% of the time, the first question that comes out of their lips is: “Did you see the Northern Lights?”
Well, who could blame them? With their ethereal movements, stunning colours, and elusive nature, it’s no surprise that the Northern Lights, also known as aurora borealis, have secured the top spot on everyone’s bucket list.
I reply to their question with a “Yup, I did!” Then I proceed to show them the photos I took of one of nature’s most mysterious attractions. Oftentimes, their eyes would go wide as they talk about how they need to go and see it, too! And then, they would ask for tips on how to chase the Northern Lights in Iceland and how to capture them on camera.
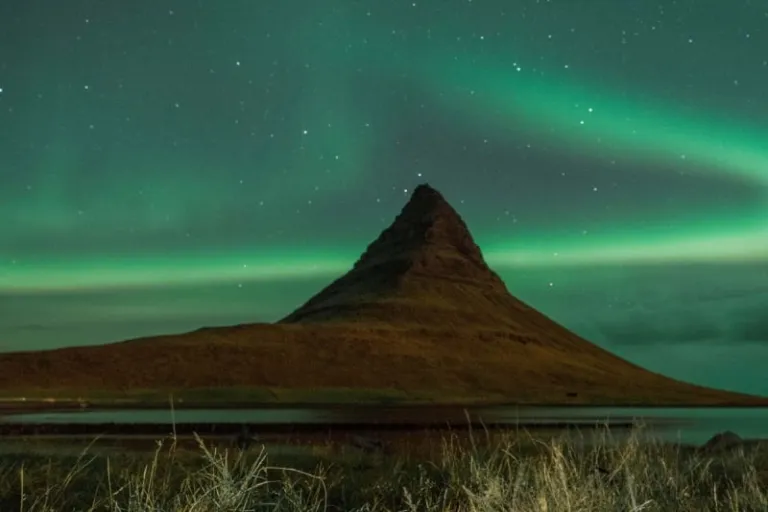
Finally crossing this off my bucket list!
To set the record straight, though, I did not go to Iceland to solely chase the Northern Lights. I went there for the waterfalls, lava fields, glaciers, and to be totally honest — the Game of Thrones filming locations. Although, since I was there in September and aurora season had just started, I knew there was a good chance I would get some aurora action.
And that, my friends, is my first tip: To avoid disappointment, don’t go to Iceland just to see the Northern Lights — especially if it’s your first time. The country has some of the most unbelievable landscapes I have ever seen. It would be a shame to miss out on them because you’re too focused on seeing the aurora borealis, which isn’t even a guaranteed experience.
Also read: Mindblowing Things to Do in Iceland Other Than Chasing the Northern Lights
Did I just burst your bubble? I hope not! While I think an Iceland trip should be more than just the Northern Lights, it wouldn’t hurt to up your chances of witnessing (and capturing) this unpredictable but breathtaking sky show by keeping these in mind:
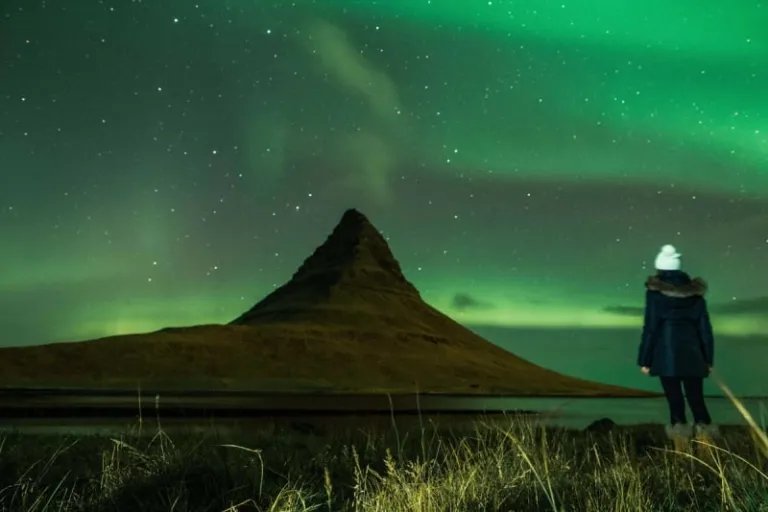
Staring in awe at one of nature’s greatest wonders
When is the best time to see the Northern Lights in Iceland?
Aurora season usually starts in September and can last until April. Yep, that’s eight months in a year! These are the months with decent night hours in the northern polar latitudes so aurora activity can be visible to the naked eye.
How long should I stay in Iceland?
Nature is extremely fickle so the longer, the better. But if you don’t have all the time in the world, the likelihood of seeing the aurora borealis if you stay for at least a week is quite high.
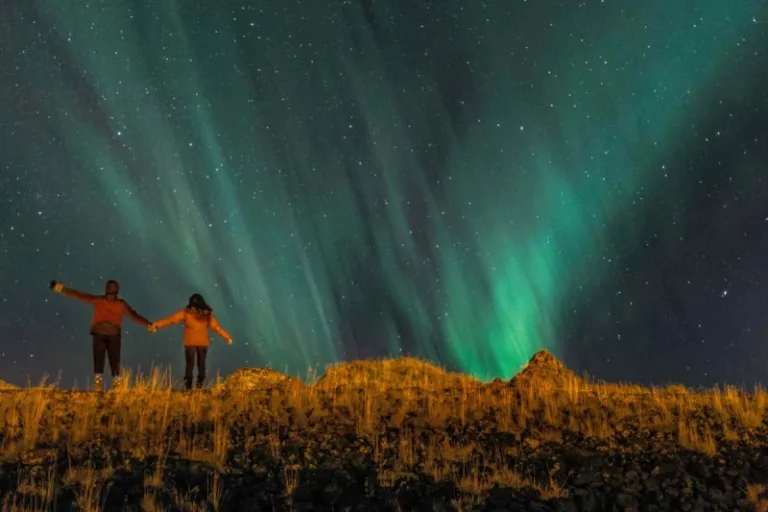
Image credit: Angely Dub of Access Travel & Tours Inc.
Under what conditions will the Northern Lights in Iceland be visible?
1. Darkness
It’ll be hard to see the Northern Lights when it’s bright out so you’ll have to wait for the sun to set and be away from towns with a lot of artificial lights to see this phenomenon.
2. Cloud cover
Clear skies are required so that means there must be little to no clouds.
3. Solar activity
The Northern Lights form when particles from the sun during a solar flare enter the earth’s magnetic field and collide with atoms and molecules in our atmosphere. This is an intermittent event that’s hard to predict but is the most important aspect of catching the Northern Lights in Iceland. It can be dark out with clear skies but without solar flare, you won’t see anything.
So yes, all of these factors must happen at the same time, which is why luck plays such a big role in aurora hunting. Since most of us don’t work for NASA, our best option for monitoring these factors, particularly cloud cover and solar activity, before heading out and waiting in the cold is by checking out the Aurora Forecast page of the Icelandic Meteorological Office (IMO), which you can click here.
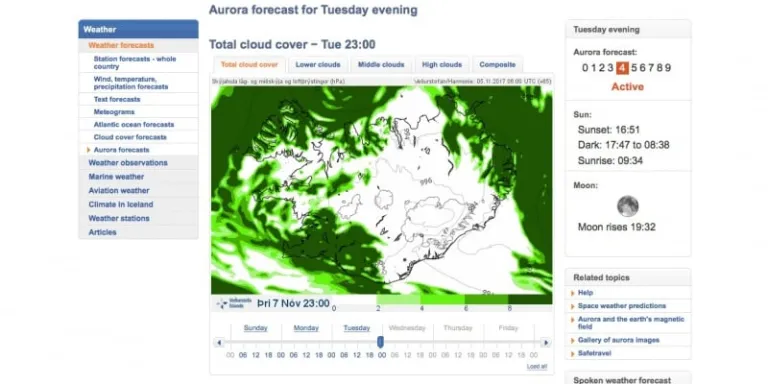
Icelandic Meteorological Office’s Aurora Forecast Page
As soon as you open the page, you will see a map of Iceland in the middle with IMO’s forecast for cloud cover. The green part shows the areas with lots of clouds while the white part shows the areas with clear skies. On the upper right side of the page, there’s a small frame that ranks aurora activity — from low (0) to high (9) — based on the Kp-index. The timing of sunset, darkness and sunrise are also given.
All of this info are available only up to three days in advance. However, don’t expect the information you get to be accurate all the time, as Mother Nature can change her mind at the last minute. But hey, they’re good enough to work with!
How long does the light show last?
No one can say with certainty because it can be different every time. The Northern Lights in Iceland can be there for as short as 15 minutes or they can dance in the sky all night long. They can also appear as soon as the sun sets or they might make you wait a few hours before deciding to show up. So, always eat before you go, as well as bring snacks!
What can I expect during the light show?
It usually gets really cold at night when aurora activity is high so dress warmly. Seeing the Northern Lights in Iceland is exciting. Catching hypothermia is not!
Also, just to give you an expectation-versus-reality scenario, the Northern Lights don’t usually appear very bright and colourful (like the ones you see in most photos) in real life. In fact, most of the time, they just look like faint greyish-white wisps of clouds moving in the sky.
Don’t get me wrong, the experience is still awe-inspiring but I just want you to manage your expectations. So yeah, fancy cameras are better at capturing the true colours of the Northern Lights than the human eye, which brings me to the next question…
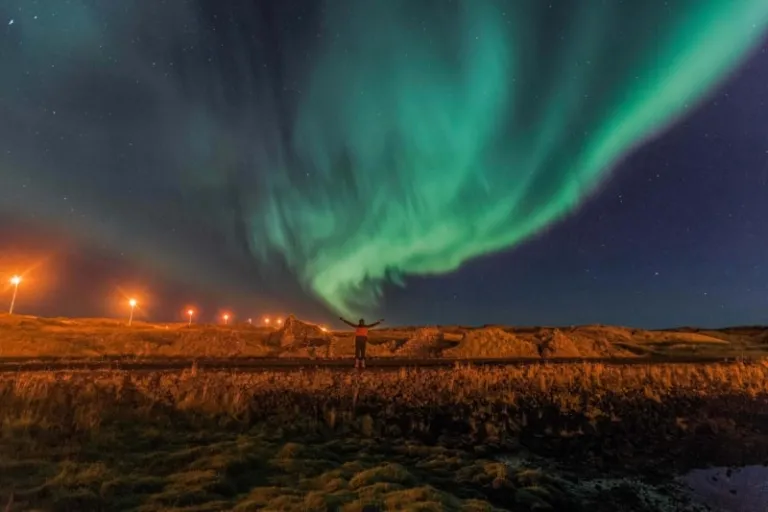
Image credit: Angely Dub of Access Travel & Tours Inc.
How do I take photos of the Northern Lights in Iceland?
Forget about taking spur-of-the-moment shots with your camera phone. The Northern Lights require way more planning than that – unless you’re fine with blurry and unrecognisable green images. But if you want to capture decent photos of the Northern Lights, you will need the following gear:
1. Camera
Get yourself a digital single-lens reflex (DSLR) or a micro four thirds camera that can shoot in manual mode. You don’t necessarily have to buy one. You can just borrow from someone. That’s what I did! Just make sure you ask that person to show you how to use it beforehand. And please, take very good care of it!
2. Lens
A wide-angle lens with a large aperture (low f-stop) is highly recommended to allow a lot of light to travel into the camera since you will be shooting at night.
3. Tripod
You will be taking long exposure shots so slight camera movements can blur your image. A sturdy tripod can prevent that from happening.
4. Extra Batteries
Batteries drain faster in the cold so have one or two extras on hand.
Other good-to-have items include a remote shutter release (to eliminate camera shake) and a ziplock bag (to defrost your camera and lens when it gets really cold).
What camera setting should I use?
Better take note on these basics:
1. Shooting Mode
You will need full creative control when shooting the Northern Lights so flipping the switch to manual is a must.
2. Focusing Mode
Cameras usually can’t auto-focus in the dark so manual focus is the only way to go. Also, you will have to set your focus ring to infinity (∞) or close to infinity to keep faraway objects sharp.
3. Aperture
In the dark, you will have to open up the aperture of your camera to allow a lot of light to enter. You can do this by selecting the lowest f-stop. Lenses with wide apertures usually have f-stops as low as f/2.0 or f/2.8.
4. Shutter Speed
I have to admit, getting the shutter speed right requires a bit of trial and error as this varies depending on how strong the Northern Lights are. I recommend experimenting between 15 to 30 seconds. The trick is to shorten your exposure when the lights are moving too fast to freeze their motion.
5. ISO
ISO measures your camera’s sensitivity to available light. Thus, high ISO is better for night photography, especially if you’re not going to use a flash. However, increasing the ISO can add grain or noise to your image so it can be challenging to get the right balance. I suggest you start with 800 then work your way up to as high as 2500 if the photo still comes out dark. If your camera has a Noise Reduction feature, it’s a good idea to turn that on too.
6. File Type
If you have ample photo editing skills, shoot in RAW format so you’ll have a lot of flexibility when it comes to post-processing.
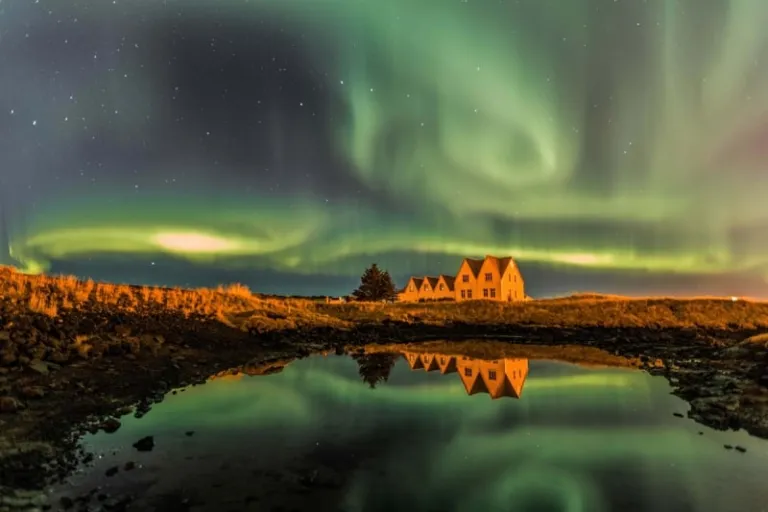
Image credit: Angely Dub of Access Travel & Tours Inc.
Also read: 20 Things to Do in Iceland Including Reykjavik and The Blue Lagoon
I know this can be information overload for beginners but trust me, Northern Lights photography is actually quite straightforward. Besides, if an amateur photographer like me was able to successfully capture the Northern Lights in Iceland on her first attempt, then so can you! Just keep trying until you get the settings right. It’ll be worth it, I promise!
About Author

A trader in the world of corporate finance but also a frustrated writer and photographer, Catherine admits to being a walking contradiction. Although born and raised in the Central Business District of the Philippines, this girl actually prefers searching for adventures in remote destinations than urban jungles. Follow her quest to become a "World Traveller" on <a href="http://www.thewandercat.com/">The Wandercat</a>.
Recommended Reads
6 Epic Train Journeys Starting from Singapore: To Bangkok, Korea & Even Europe
Cruises & Land Journeys