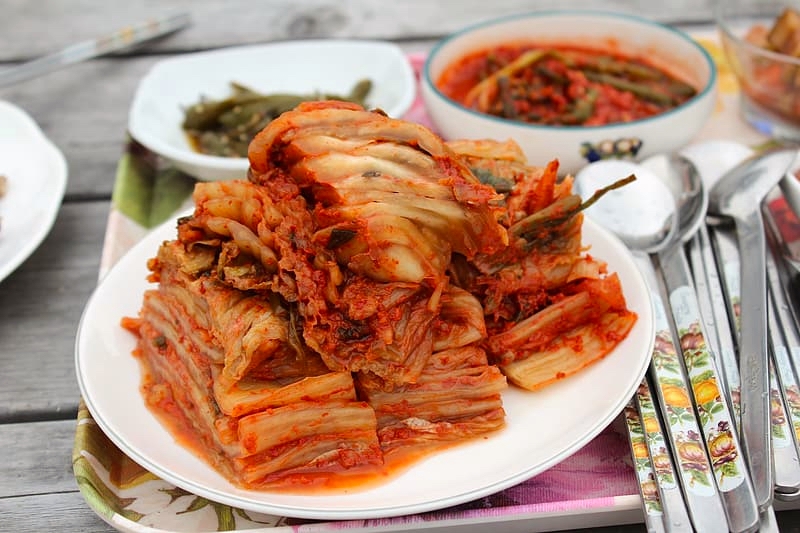
As an Asian, you’ve probably laughed at Westerners who don’t know how to cook rice at one point. (Like bro, seriously?) And then there’s that recent incident with the BBC host who poured water on (*gasp*) cooked rice. Appalling, we know! Kidding aside, though — have you ever stopped and thought, what if Koreans react that way whenever they find out about us typing ‘how to make kimchi’ on Google? Not that we can blame ‘em!
But hey, it never hurts to try and learn something new, right? And by that, I obviously mean kimchi: the crowning glory of many a Korean meal. The way I see it, learning how to make kimchi at home should count as a life skill, especially when you’re a die-hard kimchi lover like me! And don’t even get me started on its many health benefits, which we can never have too much of during these times. So, let’s get started, shall we?
How to make kimchi at home

This homemade kimchi recipe is equivalent to a one-gallon jar or 16 cups. Best to use wide-mouth jars to make the stuffing of kimchi a lot easier!
Ingredients:
For the cabbage:
- 1 large napa cabbage – around 2.2kg or 5lbs
- This is a specific type of Chinese cabbage. The closest alternative would be bok choy.
- 5 cups of water
- ½ + ½ cups coarse sea salt (separate at first)
For the puree:
- 1 tbsp glutinous rice powder
- ½ cup water (for glutinous rice powder)
- ½ cup Korean red chilli pepper flakes
- 6 tbsp fish sauce
- 3 tbsp minced garlic
For the seasoning:
- 1 large carrot – shredded into thin strips
- 250g radish – shredded into thin strips
- 2 stalks of scallions – cut into diagonal, 1-inch-long pieces
Steps:
- Slice the napa cabbage lengthwise into quarters. Then, cut the quartered pieces further into 2-inch-wide pieces. Set aside in a large bowl.
- Pour the water into a separate bowl, then dissolve ½ cup of coarse sea salt.
- Pour the saltwater into the bowl of napa cabbage, then gently mix together with your hands.
- Drain the saltwater back into its initial bowl. Set both cabbage and salt water aside.
- Sprinkle the other ½ cup of sea salt over the napa cabbage.
- Gently toss the cabbage, then pour over the remaining saltwater from the first bowl.
- Set aside soaked cabbage for 1.5 to 2 hours. Make sure to rotate cabbage pieces from front to bottom every 20 minutes.
- In the meantime, let’s make the puree! Start by mixing the glutinous rice powder with ½ cup water. Simmer mixture over low heat and stir occasionally.
- Once the mixture thickens into a paste, set aside to let it cool.
- Mix the rice powder paste with the Korean chilli pepper flakes, fish sauce, and minced garlic. This is now a puree.
- In a separate bowl, combine the carrot and radish strips. Combine with the puree, then add the scallions. Mix everything together to form what is now your kimchi mix.
- Okay, now let’s go back to the napa cabbage! Check if it has already significantly wilted. Rinse thoroughly for about 3 to 4 times to get most of the saltwater off.
- Place the dry cabbage into a larger bowl, then add the kimchi mix. Stir to combine everything well. Now you’ve got an almost-done kimchi.
- Place the almost-done kimchi into a jar or an airtight container. Make sure that there’s no excess air inside the jar or container! So, better close that lid tightly.
- Leave kimchi at room temperature for 24 hours.
- After a day, have a small taste test to see if you’re satisfied. If you prefer your kimchi sourer, leave it for another day or so. If it tastes fine to you already, then store your finished homemade kimchi in the fridge!
Some notes on making homemade kimchi

- It’s best not to use regular green cabbage. Take it from us, the output won’t be the same!
- Always use coarse sea salt granules; not Kosher salt or iodised salt, as these will make the cabbage too soft and wilted. Remember — kimchi still has to be a bit crunchy!
- Prefer your kimchi to be less sour? Put it in the fridge earlier.
- Leave it at room temperature just overnight (or 6 to 8 hours after placing it in the jar). Then, store it in the fridge first thing in the morning!
Also read: 15 Korean Dishes to Try That You Always See in K-Dramas
So, there you have it: how to make kimchi from the comforts of your home! I don’t know about you, but I definitely think this counts as a great new hobby to learn while we’re mostly stuck at home. Not only is it cost-effective, but it also saves from having to do frequent (and potentially risky) grocery runs! Lastly, there’s something extra rewarding about making your own fave banchan, don’t you think?


